Thursday, November 20, 2014

kids craft hop


With all the little hands that will need to stay occupied this holiday season this hop is just what we need to be prepared to keep them busy. Kids of all sizes love to create their own Christmas ornaments. With a few supplies and a little imagination you will have the perfect holiday activity.

I raided my stash for this project didn't step foot outside my house...I figured if you are snowed in or need a project in a pinch that you may want to see what you have on hand to keep the natives from getting restless. This is what I came up with...


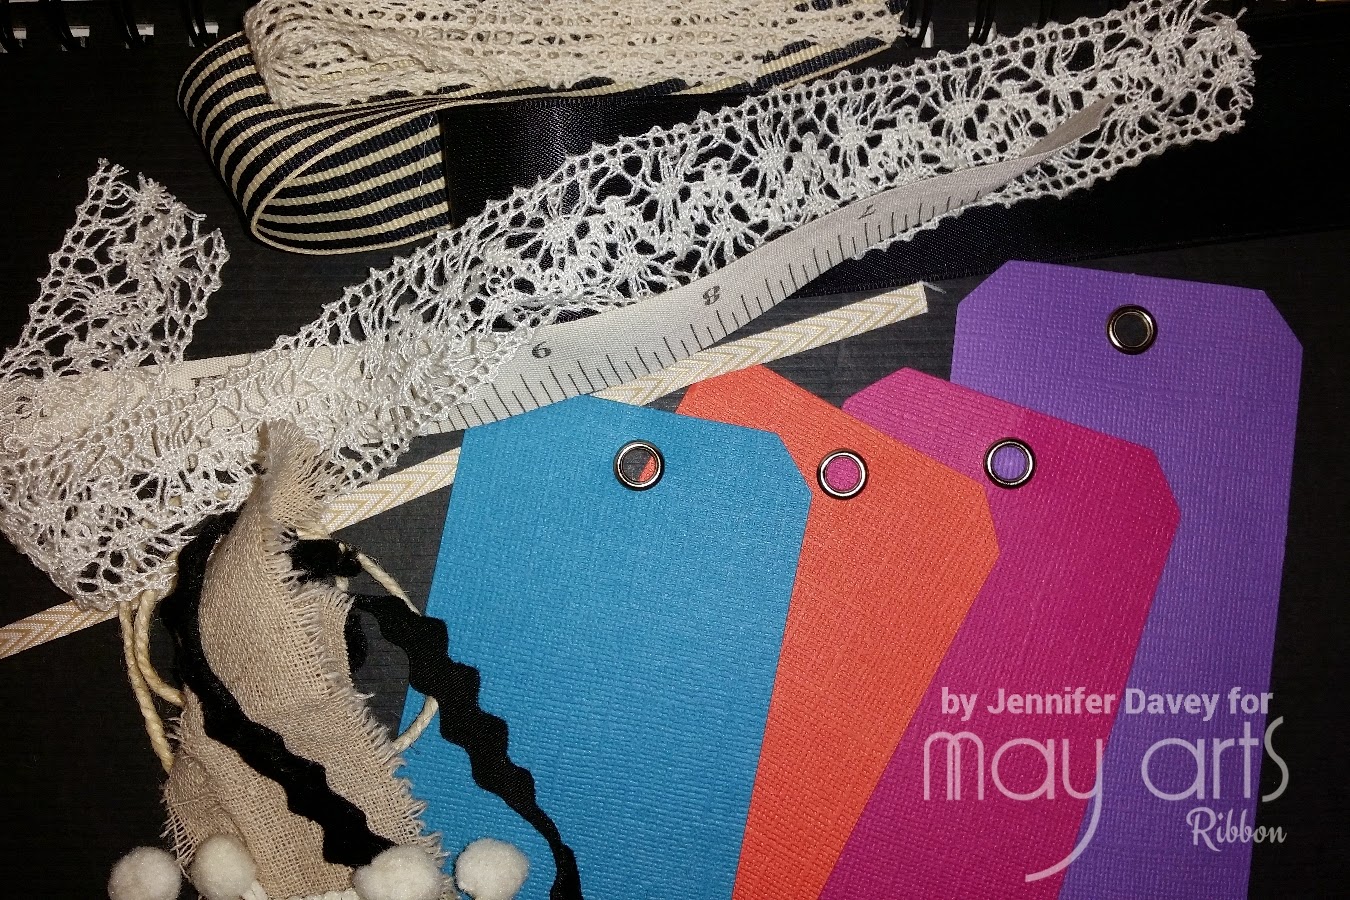
This is what I found:

ribbon (clearly I always have May Arts on hand)
Mini Pom Pom Ribbon
Twisted Burlap Ribbon
Grosgrain Ivory Striped Ribbon
5/8 inch Crocheted Ribbon
chipboard costers (came in a 4 pack from Michaels, had a rooster on them)
burlap paper  from DCWV (any scrap of burlap will probably due but this was already paper backed so it was easy to trace and cut out)
a bag of buttons (these where old shirt buttons, you know the ones you save because "someday"...well today is that ""someday!)
adhesive (used Tacky Glue and Ultimate Tacky Glue Stick)

Tools:

hole bunch - 1/8"
pencil
scissors

Here's How:

1. Trace coaster on burlap, cut 2 rounds.
2. Glue pom trim along back side edge of coaster. let dry.
3. Adhere burlap to front and back of coaster with glue stick.
4. Punch hole threw coaster about 1/4 inch from edge.
5. Pencil snowflake design onto burlap.
6. Glue Cream Twine in place, follow with buttons in desired design.
7. Thread Stripped ribbon threw hole. tie in knot and add Crocheted ribbon to finish.


Easy peasy! This would be cute with larger buttons ... Snowman? :)

Continue your days journey on the kids hop by heading over to Karen Bakers blog for more crafty ideas. Don't for get to comment on the MayArts Blog for your chance to win! Love me some free ribbon!!!


Thursday

Friday

Thursday, November 13, 2014

Cool to the Core'


Welcome hoppers this is a special day on the hop because you get to see Jennifer 3 ways! first me then Jenifer Cowles and then Jen Shears links below. Don't forget to head back after your tour and comment on May Arts and Core'dinations for your chance to win fabulous FREE product!


After receiving one on my crafting energy capsules from my fearless leader in Ribbon aka the Ribbon Lady...I was inspired by the "bright assorted tags, Core'dinations". So I dug out EVERY May Arts Ivory and Black ribbon and picked through every embossing folder I owned and off I went.


I was a little concerned about embossing with the eyelets already in place but they are a soft metal so they accepted the lovely patterns right along with the card stock! wohoo


sooo pretty all embossed and ready to distress!!!!


Using the great distressing tool (it's a foam core sanding block with a hook and loop to attach sand paper pieces) to highlight the fact that these tags are white core (hence the Core'dinations name, tricky right!?)


So this is the point that I actually realized the issue I was dreading with the eyelets...as I pulled some of the ribbons through, granted I have put 3 largish ribbons through each eyelet, the eyelet came loose. I solved the dilemma with a quick glue dab of MONO Aqua liquid glue under the eyelet and wham. fixed!


Once all was well and dried it was on to make these fabulous tabs the divider for this journal that I hope to one day feel brave enough to start using...why is it that I am intimidated by the empty page? (I used Tom-bow new Extreme Adhesive to securely affix them) I would love to be one of those amazing art Journalers who have thoughts and ink drawings with water color and tremendous amounts of artsy talent, so one day I aspire to be worthy to write in this fun journal.


As for now I added a little Keep Calm and Carry on with my old school hand press style label maker....and maybe we will add a little love one step at a time to make this journal the one I want it to be.

Alright this was fun...I almost feel like having a contest! Hmm maybe I will!!!
Alright here it is ... I will later add the details of EVERY ribbon I used to make this project BUT If you guess how many ribbons I  used by November 7th you will win a set of tags! (winner will be chosen from the right answers or the persons closest to the number.)

They will be the small size to put on gifts and such but they will be darling and you will love to give a gift with these pretty puppies on it.

So Guess the number of ribbons used and you could win designer tags! GO


supplies
LOTS and LOTS of May Arts Ribbon to be named on November 19th, 2015
bright assorted tags, Core'dinations
Tombow extreme Adhesive
Mono Aqua Liquid glue
Art Journal

tools
sizzix embossing folders:
cuttlebug embossing folder:
Sizzix die cut machine
Label Maker


Thanks for stopping by...enjoy your journey!


Monday

Tuesday

Wednesday

Thursday

Friday

Friday, November 7, 2014

thankful for table trims


If you made it here you have probably had the opportunity to see the AMAZING skills of the Ribbbonistas. What an fun group we had fun coming up with this group post and I am pleased you took the time to come and take a peek at the details of my simple little project.

This table runner is Super simple but the impact is fabulous, it could be the perfect accent to a rustic wedding or an everyday decor. Step into my office and I will give you a couple simple trick on preparing burlap.

tip 1. find the grain. I know the grain is pretty obvious right!? but it doesn't ever seem to be cut perfectly on the grain when you get it home , does it? so if you pull a strand and remove it you will see the perfect line to cute along the grain. Cut along this path you created when you re removed said strand , repeat this on all 4 sides of your project at desired size...then I removed 2 rows of woven jute to give the frayed look.
tip 2. now that you have the desired gray and frayed edge we don't want it to fray any further. Sew with a zig zag stitch around all four sides.

now that you burlap is in hand onto the ribbons. Using crocheted ribbon with the space to thread ribbon is a beautiful thing it allows you to choose your own adventure I chose a wide but supple ribbon that threads easily. Use a bodkin! it will make treading the ribbon through so much faster.
Once ribbon is threaded fold raw edge under and pin in place on burlap. Stitch along edge making sure silk ribbon is out of the way as you stitch. once each side is secured you are free to tie the perfect bow.


This project could go no sew with the right adhesive but I am a stitch it up kinda gal so even if you are a novice this would be a great 1st time sewing project.

Don't forget ... prizes abound on the MayArts blog so don't forget to take the time to go back and comment for your chance at free ribbon!!!

Thanks for stopping by!